
Beginner to intermediate · visual course

Raspberry Pi

A Raspberry Pi is a compact Linux computer that can run applications, use networks and interact with electronics through GPIO.

LinuxPythonGPIO 4 guided sessions 8 skill tracks 3 example projects
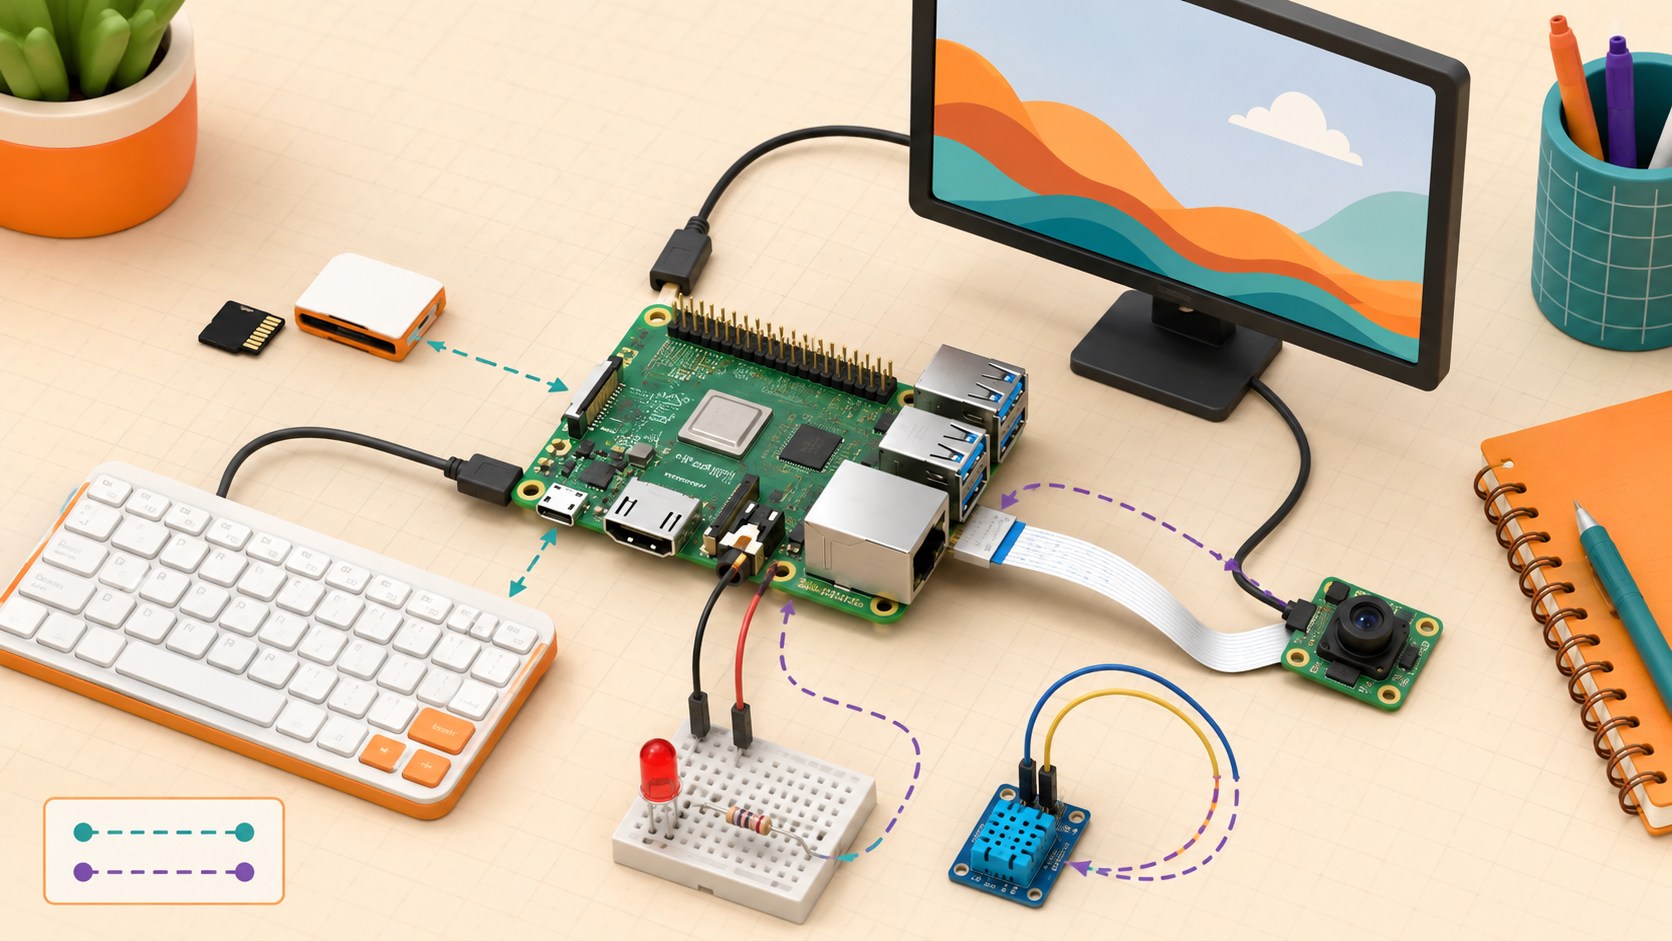
Three-dimensional single-board computer connected to storage, display, camera, LED and temperature sensor
Concept overview · generated for this Academy4Tech lesson
Start here

See the system, then build it.

Treat it as both a computer and an electronics board: shut down the operating system correctly and protect its 3.3 V GPIO pins.

01Distinguish a single-board computer from a microcontroller
02Prepare storage and navigate Raspberry Pi OS
03Use GPIO without exceeding electrical limits
04Design a small networked physical-computing service
Your progress Keep your learning momentum going

0 of 4 sessions complete

Interactive 3D learning studio

Edge-computing studio

Connect Linux software, GPIO and networking inside a small physical-computing system.

Interactive system model · loads on request Poster mode
Explore the system in 3D Inspect the labelled subsystems and watch their modelled process. The lesson flow beside it is a separate conceptual sequence unless it explicitly names the same subsystem. The poster remains available if WebGL is unsupported.
Selected lesson · conceptual flow

Computer or controller?

How is a Raspberry Pi different from an Arduino-style board?

Step 1 of 4 · Project need

Step through this lesson’s conceptual sequence here. Inspect the separate 3D subsystem model below it to understand the system’s structure.

3D subsystem inspector · 4 model parts
Mini experiment

Change one variable. Predict first, then test.

Choose a 100–400 ms sampling interval.

200 ms
Live result Move the control to test your prediction

Choose a 100–400 ms sampling interval.

Every highlighted 3D group corresponds to a labelled system part. A slider changes the model only when that relationship can be represented faithfully; otherwise the geometry stays still and the live calculation explains the effect. The model simplifies scale and geometry, so use the lesson’s safety notes, measurements and official documentation when building a real system.

01
Session 1 · 20 min

Computer or controller?

How is a Raspberry Pi different from an Arduino-style board?

Understand it

A Raspberry Pi single-board computer has a processor, memory, storage, operating system and multitasking applications. A microcontroller usually starts one dedicated program quickly and uses less power. Choose based on startup time, interfaces, power and software needs.

Interactive concept flow

Step 1 of 4 Project need

Choose a step to inspect it, or run the complete sequence.

Sequence progress
1 / 4
Picture it

A useful analogy

A laptop manages many activities; a digital alarm clock performs one focused job immediately.

Apply it

Worked example

Use a Raspberry Pi for a camera web dashboard; use a microcontroller for a battery sensor that wakes briefly every minute.

Try it
  1. List five needs for a wildlife camera.
  2. Mark which need favours an SBC or MCU.
  3. Choose one and defend the trade-off.
Quick checkWhy might a microcontroller suit a tiny battery device better?

Answer: It can use less power, start quickly and run one dedicated task without a full operating system.

02
Session 2 · 25 min

Boot, Linux and the terminal

What turns a bare board into a usable computer?

Understand it

Boot media stores the operating system. After power-up, Linux manages files, users, programs and hardware. The terminal lets you express exact commands. Updates fix bugs and security issues; project dependencies should be kept separate when possible.

Interactive concept flow

Step 1 of 4 Boot media

Choose a step to inspect it, or run the complete sequence.

Sequence progress
1 / 4
Picture it

A useful analogy

The board is a stage, the operating system is the stage manager, and applications are the performers.

Apply it

Worked example

Create a project folder, enter it, list its files and run a Python script from the terminal.

Example codeRead each line, predict, then run
mkdir sensor-project
cd sensor-project
python3 -m venv .venv
source .venv/bin/activate
Try it
  1. Write what pwd, ls and mkdir do.
  2. Draw a folder tree for one project.
  3. Plan a safe shutdown before removing power.
Quick checkWhy not simply unplug a running Raspberry Pi?

Answer: The operating system may still be writing data, so sudden power loss can corrupt files or storage.

03
Session 3 · 25 min

GPIO and physical computing

How can Linux software control real components?

Understand it

GPIO pins can be configured as digital inputs or outputs and some support alternate interfaces. Raspberry Pi GPIO uses 3.3 V logic. LEDs need resistors, motors need drivers, and 5 V must not be applied to a 3.3 V GPIO input.

Interactive concept flow

Step 1 of 4 Physical input

Choose a step to inspect it, or run the complete sequence.

Sequence progress
1 / 4
Picture it

A useful analogy

GPIO pins are small signal doors, not power sockets for large machines.

Apply it

Worked example

A Python program reads a push button and switches an LED through a resistor.

Try it
  1. Use an official pinout to find ground and one GPIO.
  2. Draw an LED with a resistor.
  3. Have a partner check polarity before power.
Quick checkCan a motor connect directly to GPIO?

Answer: No. Use a motor driver and suitable power source; the GPIO provides only the control signal.

04
Session 4 · 30 min

A networked edge project

How can a Raspberry Pi turn measurements into a service?

Understand it

A Pi can collect sensor or camera data, process it locally, store summaries and serve results over a network. Separate acquisition, processing and presentation so each part can be tested. Add authentication before exposing controls.

Interactive concept flow

Step 1 of 4 Acquire

Choose a step to inspect it, or run the complete sequence.

Sequence progress
1 / 4
Picture it

A useful analogy

A newsroom gathers reports, checks and edits them, archives the record, then publishes a clear update.

Apply it

Worked example

Read room temperature once a minute, store timestamped values and display only the latest value and a daily chart.

Try it
  1. Draw the four software parts.
  2. Define one input and output for each.
  3. Add a rule for sensor or network failure.
Quick checkWhy separate data collection from the web page?

Answer: Each part becomes easier to test, replace and recover when a failure occurs.

Beyond the guided sessions

Explore the whole Raspberry Pi field

The guided sessions teach the foundations. This map widens the view across 8 important tracks, with explanations, practice prompts, knowledge checks, and official sources for deeper study.

Use Raspberry Pi as a safe Linux computer, hardware controller, network service, media platform, and secure edge system.

Field map 0 of 8 tracks explored
Open a track to add it to your journey.
  1. Foundation Pi setup and safety
    Track overview

    A reliable Raspberry Pi project starts with the correct model, boot media, power supply, cooling, physical protection, and shutdown method.

    Core concepts

    Four ideas to understand

    1. board capabilities

      Raspberry Pi computers vary in processor, memory, connectors, networking, display, camera, and GPIO features. Match the exact model and revision to the workload and peripherals.

    2. OS imaging

      Raspberry Pi Imager writes a bootable operating-system image and can preconfigure identity, networking, and remote access. Verify the target drive before writing because imaging replaces its contents.

    3. power and cooling

      An inadequate supply or cable can cause undervoltage and instability, while sustained workloads may need thermal management. Use the model-specific power guidance and monitor throttling under real load.

    4. handling, backup, and shutdown

      Handle an unpowered board by its edges on a non-conductive surface and avoid loose metal. Keep a tested backup before system changes, and shut the operating system down before removing power so pending writes do not corrupt storage.

    Check your thinking Why is unplugging a running Raspberry Pi riskier than unplugging a simple microcontroller board?
    Answer

    Its operating system may be writing cached data to storage, so sudden power loss can corrupt files or the filesystem.

  2. Foundation Linux essentials
    Track overview

    Raspberry Pi OS uses Linux files, users, permissions, packages, and processes, so command-line fluency supports every later project.

    Core concepts

    Four ideas to understand

    1. files and permissions

      Linux paths form one directory tree, and ownership plus read, write, and execute permissions control access. Grant the narrowest permission needed instead of making files globally writable.

    2. shell navigation

      Commands such as pwd, ls, cd, cp, mv, and mkdir inspect and organize files. Quote paths containing spaces and verify a command target before copying, moving, or deleting.

    3. package management

      APT verifies signed repository metadata and package hashes, then resolves packages and dependencies from configured repositories. Refresh metadata and apply supported upgrades rather than downloading random installers as administrator.

    4. processes and logs

      A process is a running program with an identity, resources, and exit status. Process tools and the system journal reveal crashes, startup failures, resource use, and service history.

    Check your thinking What does execute permission mean on a directory?
    Answer

    It allows traversal or access to entries inside the directory, subject to the other permissions.

  3. Applied GPIO with Python
    Track overview

    GPIO lets Python observe and control low-voltage signals, but software abstractions never remove the electrical limits of the pins.

    Core concepts

    Four ideas to understand

    1. pin numbering

      Physical header positions and Broadcom GPIO numbers are different schemes. Use one documented scheme consistently and confirm the model pinout before connecting anything.

    2. digital input and output

      GPIO Zero represents devices such as LEDs and buttons as Python objects with clear actions and states. Inputs need defined pull resistors, and outputs need current-limiting or driver circuits as appropriate.

    3. event callbacks

      Callbacks respond to edges or device events without a busy polling loop. Keep callback work brief and synchronize any shared state used by other threads or handlers.

    4. electrical limits

      Raspberry Pi computer GPIO uses 3.3 V logic and is not 5 V tolerant. GPIO pins must not directly power motors, relays, or other high-current loads.

    Check your thinking Can a 5 V sensor output be connected directly to a Raspberry Pi GPIO input?
    Answer

    No; the GPIO is 3.3 V logic and is not 5 V tolerant, so use a safe level interface.

  4. Applied Hardware interfaces
    Track overview

    I2C, SPI, UART, and camera interfaces connect richer peripherals, each with its own addressing, timing, cabling, and software stack.

    Core concepts

    Four ideas to understand

    1. I2C devices

      I2C shares clock and data lines among addressed peripherals and normally needs pull-ups to the correct logic voltage. Scan the bus carefully and resolve address conflicts before writing device code.

    2. SPI devices

      SPI provides clocked, full-duplex transfer and usually a chip-select line per device. Mode, speed, word order, voltage, and cable quality must match the peripheral.

    3. UART devices

      UART communicates with asynchronous transmit and receive lines at matching frame settings. Use 3.3 V-compatible signals and do not confuse TTL serial with higher-voltage RS-232.

    4. camera stack

      Current Raspberry Pi camera software uses the libcamera-based rpicam applications and Picamera2. Exposure, focus, frame rate, resolution, bandwidth, and consent all shape a camera project.

    Check your thinking Why must I2C devices on one bus have distinct addresses?
    Answer

    The controller uses the address to select which shared-bus device should respond.

  5. Applied Networking and web
    Track overview

    A networked Pi needs stable naming and addressing, authenticated remote administration, and a web interface that treats every request as untrusted.

    Core concepts

    Four ideas to understand

    1. addressing and names

      DHCP usually assigns an address, while hostnames and mDNS can make a local device easier to find. A service that must stay reachable needs a deliberate reservation or discovery strategy.

    2. secure shell access

      SSH provides encrypted remote terminal access; key authentication avoids sending a reusable password for each login. Restrict users, protect private keys, and disable access you do not need.

    3. web servers

      A small web framework maps requests to handlers that return responses. Bind only to intended interfaces, validate parameters, limit request size, and use a production server and TLS for exposed deployments.

    4. API design

      An API should define resources, methods, status codes, schemas, authentication, and errors. Timeouts and idempotent operations make retries safer when networks are unreliable.

    Check your thinking What is the security advantage of SSH key authentication?
    Answer

    The server verifies proof from a private key that remains with the client instead of relying only on a reusable account password.

  6. Advanced Data and media
    Track overview

    Edge data and media systems must manage schema, storage wear, timestamps, capture schedules, bandwidth, and access to recorded people or places.

    Core concepts

    Four ideas to understand

    1. SQLite storage

      SQLite stores structured data in one transactional database file without a separate server. Parameterized queries, indexes, schema migrations, backups, and retention rules keep it dependable.

    2. scheduled capture

      A scheduler can trigger sensor or camera jobs at known times, but jobs must handle overlap, missed runs, storage limits, and clock changes. Each output should carry capture time and settings.

    3. audio-video streams

      Resolution, frame rate, codec, bitrate, and latency trade image quality against compute, storage, and network use. A test should measure dropped frames and end-to-end delay, not only whether video appears.

    4. visualization

      A useful view labels units and time, distinguishes missing data from zero, and summarizes trends without hiding raw anomalies. Limit personal or sensitive detail to the people who need it.

    Check your thinking Why is a codec used for a video stream?
    Answer

    It compresses video to reduce storage or bandwidth, usually trading compute and some quality or latency.

  7. Advanced Services and automation
    Track overview

    Unattended Pi projects need supervised services, controlled schedules, messaging, observability, and recovery that survives reboots and outages.

    Core concepts

    Four ideas to understand

    1. system services

      A service manager can start an application after dependencies, restart it under defined conditions, and collect logs. Run it as a dedicated unprivileged user with explicit environment and paths.

    2. scheduled jobs

      Timers run maintenance or collection tasks on a schedule and can express ordering more clearly than an infinite sleep loop. Jobs need timeouts, locking, and visible failure reporting.

    3. MQTT and brokers

      A broker decouples publishers from subscribers through topics. Use authenticated clients, narrow permissions, encrypted transport where needed, retained-message care, and safe behavior when messages stop.

    4. logs and recovery

      Structured logs, health checks, metrics, and bounded retries reveal why a service failed. Recovery should avoid restart storms and preserve enough evidence for diagnosis.

    Check your thinking Why should an unattended service use bounded retry backoff?
    Answer

    It avoids a rapid retry loop that wastes resources and can overload a failing dependency.

  8. Advanced Secure edge systems
    Track overview

    A secure edge system reduces exposed services and data, isolates workloads, keeps software supported, and fails predictably when models or hardware are uncertain.

    Core concepts

    Four ideas to understand

    1. system hardening

      Change default credentials, patch supported software, remove unused services, restrict firewall paths, and review accounts and keys. Security is a maintained state, not a one-time setup.

    2. container isolation

      Containers package an application and dependencies but share the host kernel, so they are not a perfect security boundary. Pin trusted images, drop privileges, minimize mounts, and update both image and host.

    3. edge inference

      Local inference can lower latency and keep raw data nearby, but models still need representative evaluation, versioning, resource limits, and a non-AI fallback. Measure temperature and throttling during sustained use.

    4. privacy and secure retirement

      Minimize capture, indicate when sensors are active, restrict access, define retention, and obtain appropriate consent. Before reuse or disposal, revoke credentials and securely erase or destroy storage as risk requires.

    Check your thinking Why does running an application in a container not remove the need to secure the Raspberry Pi host?
    Answer

    Containers share the host kernel and depend on host permissions, networking, storage, and updates.

Verified next steps

Official references

Use these primary sources to extend the explanations and check current guidance.

  1. Raspberry Pi Ltd Getting started
  2. Raspberry Pi Ltd Raspberry Pi OS
  3. Raspberry Pi Ltd Raspberry Pi computer hardware
  4. Raspberry Pi Foundation gpiozero
  5. Raspberry Pi Ltd Remote access
  6. Raspberry Pi Ltd Camera software
  7. Python Software Foundation sqlite3 — DB-API 2.0 interface for SQLite databases
  8. systemd project systemd — System and Service Manager
  9. OASIS Open MQTT Version 5.0
  10. Raspberry Pi Ltd Raspberry Pi Documentation — Security
Three-project build pathway

Learn Raspberry Pi by making it work.

Start small, combine the ideas, then complete a measured challenge. Every project includes a material list, four build milestones, evidence to collect, and a safe next step.

  1. Starter · 60–90 minutes Local Pi Health Dashboard Learn one dependable building block Build a local-only Python dashboard that reports the Raspberry Pi’s CPU temperature, disk use, memory use, uptime, and data freshness without sending system information to an external service.
    What you will learn

    Learning goals

    • Relate Linux files, processes, permissions, and system measurements.
    • Validate and timestamp measurements before presenting them.
    • Choose warning thresholds and explain why one reading is not a diagnosis.
    Prepare

    Materials and tools

    • Raspberry Pi running a supported Raspberry Pi OS, or a Linux development substitute
    • Python 3 and a browser on the same device
    • Official power supply and ventilated setup
    • Dashboard starter template or terminal output option
    Build sequence

    Four milestones

    1. List each metric, its Linux source, unit, update rate, valid range, and unavailable-data state.

    2. Write separate Python functions to read, validate, timestamp, and format the metrics.

    3. Create a local display with normal, warning, unavailable, and stale states plus a last-updated time.

    4. Test low disk-space with a mocked value, pause collection to trigger stale status, and document limitations.

    Prove it works

    Evidence to collect

    • Displayed values match trusted local commands within an explained rounding tolerance.
    • Mocked warning, unavailable, and stale conditions are visually distinct and do not crash the dashboard.
    • The service listens only on the intended local interface and collects no personal information.
  2. Builder · 2–3 hours GPIO Event Journal Connect multiple ideas into a working system Create a low-voltage button station that records debounced press and release events to SQLite, drives a status LED, and offers a local summary page. A GPIO mock makes the same software testable without hardware.
    What you will learn

    Learning goals

    • Use GPIO numbering, pull resistors, event handling, and cleanup correctly.
    • Persist timestamped events safely with SQLite transactions and parameterized queries.
    • Design software that can be tested with a mock input before connecting pins.
    Prepare

    Materials and tools

    • Raspberry Pi with supported OS or GPIO mock environment
    • Momentary push button, low-power LED, current-limiting resistor, and jumper wires
    • Python gpiozero and sqlite3
    • Breadboard diagram, multimeter if supervised, and local browser
    Build sequence

    Four milestones

    1. Implement and test a mock button-to-event pipeline including bounce, rapid presses, and clean shutdown.

    2. Draw the 3.3 V circuit and pin table, power down, wire it, inspect it, and only then apply power.

    3. Record press/release events with monotonic sequence, wall-clock timestamp, source, and quality status.

    4. Build a local summary of counts and timing, then verify database recovery after an interrupted simulated write.

    Prove it works

    Evidence to collect

    • One intentional press produces one accepted press event across the documented debounce test set.
    • The database remains readable and contains no partial record after the simulated interrupted transaction.
    • Mock and hardware modes follow the same interface and leave the LED and GPIO in the documented safe state on exit.
  3. Challenge · 4–6 hours Resilient Edge Data Service Test, measure, and improve a complete solution Deploy a least-privilege local service that samples simulated devices, buffers observations through a network outage, restarts after failure, and synchronizes safely when a local practice broker returns.
    What you will learn

    Learning goals

    • Combine Linux service management, local storage, networking, observability, and recovery.
    • Apply least privilege, credential protection, bounded buffering, and authenticated messaging.
    • Test outage, restart, malformed-data, duplicate-message, and low-storage scenarios systematically.
    Prepare

    Materials and tools

    • Raspberry Pi with supported OS or equivalent Linux virtual machine
    • Python virtual environment and simulated sensor processes
    • Local authenticated MQTT practice broker
    • SQLite buffer, systemd user service, and scenario test sheet
    Build sequence

    Four milestones

    1. Define service user, directories, configuration, message schema, buffer limits, health signals, and recovery contract.

    2. Implement validated sampling and transactional buffering with unique event IDs and oldest-first bounded retention.

    3. Run the service under systemd with restart limits, structured logs, protected configuration, and explicit shutdown cleanup.

    4. Test broker outage and recovery, process crash, malformed input, duplicate delivery, low storage, and controlled upgrade rollback.

    Prove it works

    Evidence to collect

    • During a measured outage, accepted observations are buffered within the stated limit and synchronized once without silent duplication after recovery.
    • The service runs without root privileges, keeps credentials outside source control, and exposes actionable health without logging secrets.
    • A six-scenario report includes timelines, logs, expected and actual results, recovery, data loss if any, and remaining limitations.
Words to know

Build your vocabulary.

SBC
A complete computer built on one circuit board.
Boot media
Storage containing the operating system used at startup.
Linux
The operating-system family used by Raspberry Pi OS.
GPIO
Pins software can use for general digital input and output.
Headless
Operating without a directly attached screen or keyboard.
Service
A program that provides a function to other programs or users.
Work safely

Before you power or move anything.

  • Power off before connecting components.
  • Raspberry Pi GPIO uses 3.3 V logic; never feed 5 V into a GPIO input.
  • Use a driver and separate appropriate supply for motors and other high-current loads.
Keep studying

Official documentation.

These lessons simplify the first ideas. Use the original documentation when building, checking details or moving to the next level.

Continue learning

Related Academy4Tech content.

Learn by building.

Choose a real project, identify the smallest subsystem you can test, and document what the measurement tells you.